Few people comprehend the significance of furniture product photography on a large scale. One is not only taking pictures of furniture to display on a website, but also to get customers to buy the goods and fall in love with them. Photography of furniture is distinct from photography of other products. To put it mildly, scale is a factor in furniture photography. The items are comparably enormous in size. In order to execute things correctly, special planning and execution are needed. Going through this article will help you understand how optimizing your furniture photography will be helpful.
1. Ideal Background for Furniture Photography
2. Furniture Photography Ideas
3. The Best Camera for Furniture Photography
4. Best Lens for Furniture Photography
5. Best Lighting for Furniture Photography
6. Furniture Product Photography Setup
7. Advantages of having furniture recolored
8. Furniture Photography Tips
9. How Post Production Helps Furniture Photography
10. FAQ
1. Ideal Background for Furniture Photography
Color Background
Product photography for online businesses typically uses a white or gray background. The most neutral and subdued color is thought to be white. It’s best to photograph things on a medium-gray backdrop when the subject is neutral, or the object is white or black. Neutral backgrounds are ideal for providing a clear visual perception of patterned items or those where patterns are predominant. Vivid colors provide uniformity throughout sites and help people navigate, locate what they need, and save time. Product photographers are increasingly using innovative techniques to identify products in online stores based on their experience. For instance, the color red is linked to passion, so it works well as a backdrop for product photographs of cosmetics, colognes, certain types of clothes, and footwear.
Atmosphere Impression
The value of location extends beyond the realm of real estate. The location you choose to shoot your furniture photos will affect the final product. Make sure the space is tidy and attractive. Use a pleasing backdrop while taking studio photos of furniture. A white sheet that is wrinkled will not photograph well and will distract from the furniture. If there is plenty of natural light available, it’s better to use it rather than artificial light. You can use the beautiful natural light that will be available if you take photos next to a window. For the highlights and shadows to be evenly distributed, you might still need to direct the light using some bounce or a reflector, as sometimes you don’t have enough window light, and the weather isn’t great. This is how the impression of the atmosphere can be altered to take perfect pictures.
Green Screen
The ideal instrument is the green screen. This is a simple method that has been used for around 100 years in layering one picture on top of another. At Dropyourimage, we always use green screens during furniture photography as it helps add a background of your choice during post-production of the pictures.
2. Furniture Photography Ideas
Are you interested in learning how to shoot furniture for your online business so you can provide reliable photographs for your clients? Selling and purchasing furniture, whether it is new, used, broken, or in pristine condition, is stressful for everyone concerned. Customers are constantly searching for a speedy, dependable, and stress-free service. So here are some ideas to keep in mind while doing furniture photography.
Set up the Furniture
Always get your product ready. Make sure the furniture is spotless, all tags are gone, and materials like wood, leather, and metal are polished and vibrant. If your furniture has to be assembled, give yourself ample time and preparation. Don’t hide flaws if you’re selling used furniture. Scratches and other damage should be left in the frame if you are unable to repair it so your consumer can see the true state of your goods. Accuracy boosts both your reputation as a vendor and client satisfaction.
Use the Right Lens
Be careful when choosing the lens for your camera since you do not want to ideform your furniture. Avoid using a macro or wide angle in these circumstances. A flexible lens should have a focal length between 50mm and 75mm; this will allow for the least amount of distortion. It is possible to shoot using a camera you probably already have in your pocket. Even though we advise using a professional-grade camera and lens, smartphones are enabled for on-the-go filming and equipped with high-quality cameras.
Don’t Over Style Your Furniture
When you style your furniture, you want it to appear charming and pleasant, but it’s typically a mistake. Your piece’s styling may not be to your client’s taste, and in most situations, it will distract from or obscure something your buyer wants to see. So it’s advisable you don’t over style your furniture.
Use Different Angles for the Shoot
Show as much of the product to the consumer as you can. Grab their interest with multiple photos instead of just using one image and moving on. Take a variety of angles and close-up shots of details. Make it a practice to take photos from many angles, including the front, rear, each side, and 45 degrees. Include detailed photographs to draw attention to particular features you believe make the furniture special and will attract your customers, such as fabric patterns, wood grain, engravings, and etchings. The more views and information you can provide about your furniture, the more assured a consumer will be in their choice to buy.
3. The Best Camera for Furniture Photography
The need for the best camera for product photography is higher than ever. There are many people who sell goods online who take product photos; it’s no longer simply the professionals who take pixel-perfect pictures in a studio. However, it might be difficult to capture furniture items in dynamic and exciting ways. Although you can accomplish this with natural light, you’ll find it’s simpler if you obtain your own illumination and great equipment, which includes the correct camera.
Since furniture photography is essentially still life, there are many camera comparison aspects you don’t really need to care about. For example, AF speed isn’t a big deal when your subjects aren’t moving. However, since you might need to print or enlarge your photographs significantly, resolution and clarity are important. Let’s have a look at some of the best cameras you can use for furniture photography.
- Sony A6100 – This is the perfect camera for product photography. It should be able to do a little bit of everything and do it rather effectively. The 24.2MP sensor in this APS-C mirrorless camera allows it to capture photographs of exceptional quality while also being incredibly user-friendly. There are several large-aperture lenses available for the Sony E-mount that cay be used to take pictures with a narrow depth of focus. With its small size and light weight, this camera is portable and offers several useful functions, such as the ability to film in a 1:1 aspect ratio.
- Sony RX100V – With everything you need in one handy package, this decently small camera is ideal for product photography. The Sony RX100 V, which features a 1-inch sensor and a 24-70mm equivalent lens with an f/1.8-2.8 maximum aperture range is unquestionably something we’d advise purchasing. With a camera compact enough to carry everywhere, this is essentially all you’ll need for product photography, enabling you to snap stunning pictures in any lighting situation.
- Nikon D3500 – Although mirrorless cameras undoubtedly continue to progress, there’s something incredibly dependable about a DSLR. These cameras are still quite pleasurable to use, and with models like the Nikon D3500, you can capture excellent pictures. As the entry-level model in the Nikon line, this camera has a ton of helpful instruction modes to make it easier for novice users to understand its operations. Nevertheless, it’s simple to create a potent product photography setup with the D3500 thanks to access to the wide variety of F-mount lenses.
- Sony A7R IV – The Sony A7R IV is one of the greatest professional-grade cameras available for photographing products. In addition to having a sensor with a resolution of 61 MP, which is among the highest available, it also incorporates Pixel Shift Multi Shooting, which combines numerous photos to produce photographs with a maximum resolution of 240 MP. And you’re allowed to use these settings to their fullest extent while you’re photographing objects that don’t move! One of the best high-resolution cameras available for product photography is the A7R IV; to obtain more pixels and image detail, one must go to medium format.
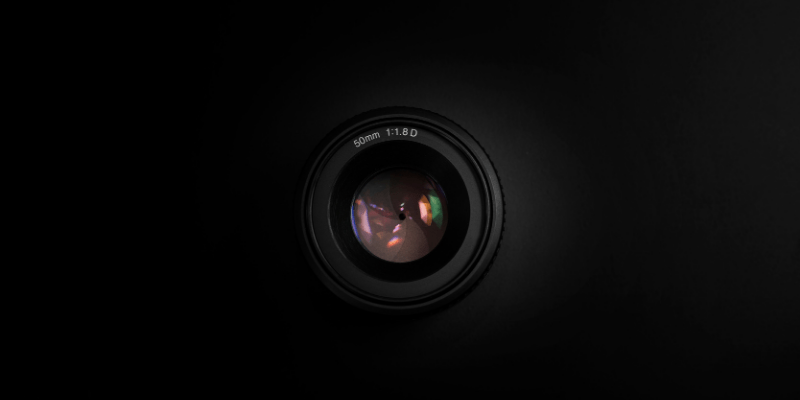
4. Best Lens for Furniture Photography
- Nikon AF-S FX NIKKOR 24-70 mm f/2.8E – One of the greatest focal lenses for product photography is the NIKKOR 24-70 mm f/2.8E lens since it has the technical capabilities to meet the demands of even the most discerning advertising photographers. Additionally, its superb image quality draws in potential consumers. Nikon’s vibration control technology and enhanced optical design are also features of NIKKOR lenses. It assists in adjusting shutter speeds four steps longer and prevents blurring, which is brought on by camera shaking.
- Tamron SP 35 mm f/1.8 – Although it has a wide angle, this 35 mm lens for product photography makes it possible to produce lovely pictures with a sharp backdrop. The Tamron SP 35mm offers ideal clarity, an excellent image, and volume, making it a terrific choice for taking pictures of furniture.
- Nikon AF-S DX Micro-NIKKOR 40 mm f/2.8G – The AF-S DX Micro Nikkor 40 mm is lightweight, and its tiny size distinguishes f/2.8G. The ideal Nikon lens for shooting pictures of furniture is one that provides a wide view while capturing all the components and other details in sharp focus. It is the ideal lens for close-ups because of the 1:1 shooting scale, with a minimum focus distance of 16 cm. High brightness (f/2.8 as the maximum aperture setting) enables the capturing of background objects while maintaining their blur. Also, it makes it easier to capture high-quality photographs in low light.
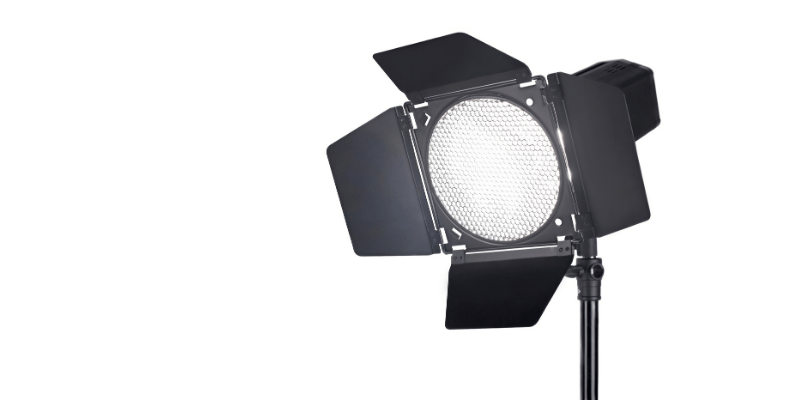
5. Best Lighting for Furniture Photography
Unfortunately, your furniture won’t likely fit in our standard setup for a tabletop picture shoot. Therefore, choosing a location to shoot furniture might be challenging. Find a location with lots of light that is at least three times the size of your item, for instance, outside on a cloudy day or close to a window. It is best to use natural light, particularly with the distinctive sizes and shapes of furniture. If you’re shooting outside or directly next to a window, try to stay out of the direct sunshine. You don’t want the light to produce sharp shadows. When photographing furniture close to a window, eliminate harsh shadows by diffusing the light with a sheet or a piece of white paper.
6. Furniture Product Photography Setup
You can take realistic images of your furniture for your online business by following this furniture product photography setup.
- Polish Your Furniture- Furniture photography is no different than any other sort of good product photography in that attention to detail is essential. Hence, be careful to dust those bunnies and buff off any blemishes or flaws. Before beginning your picture session, polish your furniture using furniture polish or a multipurpose cleaner to make it look its best. Your client already anticipates receiving their order in excellent condition, so you are saving yourself a step before shipping.
- Set up the background – The greatest place for your goods when showcasing a single piece of furniture tis in front of a white background . It’s simple to locate low-cost backdrop supports and rolls of paper online for a product this size. The most crucial action is to make a smooth transition between the vertical and horizontal planes in order to generate a photographic sweep. The arrangement you see above, which includes a backdrop stand, a roll of paper, and a few clamps, was ideal.
- Choose the Correct Angle – Choose a perspective that lets you see your furniture’s front, side, and top all at once. Photographing at an angle can provide the client with a better visual depiction of your product’s proportions, while shooting front-on will confuse your buyer and make your piece look flat.
- Take Numerous Shots – Also, taking many shots can aid your consumer in better understanding the appearance and feel of your furniture piece. Note that while your buyers can’t touch or feel the furniture, giving them that impression from photos of your goods can help them trust you as the vendor and perhaps even imagine owning your products.

7. Advantages of having furniture recolored
If you sell furniture online, it is essential to have beautiful, attractive photos of the furniture you offer. The color of a piece of furniture can have a significant impact on its attractiveness, and sometimes it is necessary to change the color of furniture to better fit the style of your brand or make it more appealing to your target audience. In this article, we will discuss the benefits of outsourcing the furniture recoloring process to a professional photo editor.
- Professional Quality
A professional photo editor has experience in recoloring furniture and has the necessary skills and tools to do so. This results in professional, high-quality photos that attract the attention of potential customers. - Save Time
Recoloring furniture can be a time-consuming process, especially if you have no experience with photo editing. By outsourcing this task to a professional, you can focus your time and energy on other important aspects of your business. - Consistency
If you sell multiple pieces of furniture in different colors, it is essential to ensure that the photos of all furniture look consistent. A professional photo editor can ensure that all photos have the same style and fit the look of your brand. - Cost-Effective
Although hiring a professional photo editor to recolor furniture can be an additional cost, it can ultimately be cost-effective. Professionally edited photos can lead to more sales and higher revenue, making the investment in photo editing pay for itself. - Customer Satisfaction
Beautiful, professionally edited photos of your furniture can attract customers and influence their purchasing decisions. Additionally, recoloring furniture can improve its functionality, such as achieving a better color match with the environment. This can lead to higher customer satisfaction and positive reviews, which can, in turn, lead to more sales.
In conclusion, hiring a professional photo editor to recolor furniture can offer numerous benefits. It can result in professional, high-quality photos that attract customers and influence their purchasing decisions. By saving time and costs, you can focus on other important aspects of your business and achieve a consistent look for your products.
8. Furniture Photography Tips
Here are some simple furniture photography tips you can follow while preparing for your photoshoot.
- Work with Natural Light – Landscape and outdoor photographers frequently choose a light that is available in the early morning and late afternoon when the sun is lower in the sky. Choose a time of day when there is enough natural light in your room for indoor photography. Using natural light can prevent unsightly reflections, particularly when photographing bright or mirrored furniture. Nonetheless, only a small number of houses benefit from abundant natural light in each room. Lamp lights may also be employed in various situations to produce a cozy or personal vibe.
- Clean the furniture – Make sure your furniture is spotless before you take pictures because photography brings out all kinds of flaws, including fingerprints, dust, and other blemishes. You might like styling your furnishings as well. This will give you a chance to express yourself and capture the right mood.
- Use the Right Lens – Your main instrument for taking photographs of furniture products will be a lens, so it is crucial you select the appropriate lens. The 24-70 mm lens is utilized most frequently. You can easily capture details without losing your frame with the great mobility of the zoom feature.

9. How Post Production Helps Furniture Photography
After your furniture has been photographed, it’s time for post-production . A little polish in a tool like Photoshop will go a long way towards improving the quality of your images and giving your product the best possible presentation. Dust, fingerprints, and other traces that don’t belong on your goods should also be removed. When photographing shiny surfaces like metal, soften strobe light highlights. When photographing huge items, highlights are unavoidable, but if they are softened, and shadows are opened up, the image will seem cleaner. Keep some contrast, highlights, and shadows in your image since these elements aid in helping your buyer understand the material of your furniture. To help your product stand out, you can apply shadows as well. A subtle approach to adding genuine depth without offending your clients is natural, drop, or reflecting shadowing. Consider outsourcing your furniture photography if you don’t have the time to dedicate to post-production work and want to save time and money.
10. FAQ
It is best to use natural light, particularly with the distinctive sizes and shapes of furniture. If you’re shooting outside or directly next to a window, try to stay out of the direct sunshine. You don’t want sharp shadows. You have to be very careful about the type of light you use for furniture photography as it might lead to blurry and unclear images.
A prime lens, such as a 30mm or 50mm, will perform well for furniture photography. Choosing the proper lens is not always simple. A prime lens offers the best clarity and crispest detail, so long as you have the mobility to move around and get near the subject.
There are various ways to style furniture for photography, such as setting up the furniture, adjusting the lights, setting up the studio, and selecting the correct angle and position for the shoot.
Make sure your house is tidy and uncluttered so you can snap appealing pictures of the furniture. To highlight the greatest characteristics of the product, style the furnishings and props for the camera rather than for real life. Choose a time of day when you have the most indirect light for shooting.
Shoot in an area with decent lighting to capture the furniture in a good light. Make sure the furniture is at its finest and take several pictures from different angles. In order for your photographs to come out sharp, shoot on a tripod with a high f/stop value, like f11.
Find a location with lots of light that is at least three times the size of your item. For instance, outside on a cloudy day or close to a window. It is best to use natural light, particularly with the distinctive sizes and shapes of furniture. If you’re shooting outside or directly next to a window, try to stay out of the direct sunshine.