High Dynamic Range (HDR) photography is a powerful technique that has revolutionized the way we capture and display images, particularly in the realm of real estate photography. HDR enables photographers to represent a wider range of luminosity levels in their images, capturing details in both the brightest and darkest areas. This is achieved by merging multiple exposures of the same scene into a single, well-balanced photograph.
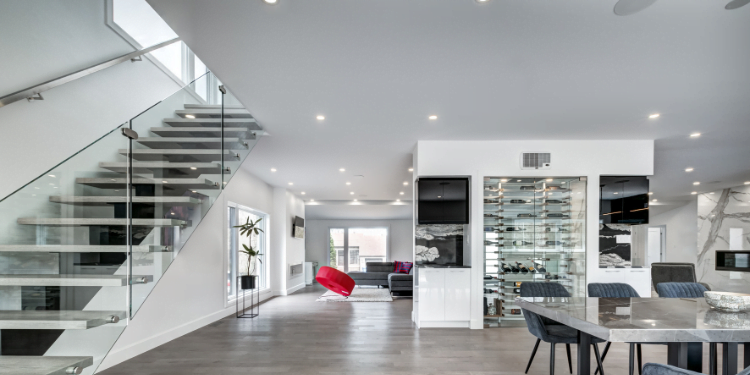
The importance of HDR in real estate photography cannot be overstated. In an increasingly competitive market, high-quality images are essential for showcasing properties in the best possible light and attracting potential buyers. HDR photography allows real estate professionals to create visually stunning and realistic images that emphasize the unique features and ambience of a property.
The objective of this blog is to provide you with a comprehensive step-by-step guide to HDR real estate photo editing. Whether you’re a seasoned professional or a beginner looking to enhance your skills, this guide will equip you with the knowledge and techniques necessary to create captivating HDR images that make your property listings stand out from the competition.
Step 1. Understanding the Basics of HDR Photography
Step 2. Essential Equipment for HDR Real Estate Photography
Step 3. Capturing HDR Real Estate Photos
Step 4. HDR Real Estate Photo Editing Process
Additional Tips for Professional HDR Real Estate Photo Editing
Conclusion
Step 1. Understanding the Basics of HDR Photography
Definition and purpose of HDR
High Dynamic Range (HDR) photography is a technique that aims to capture a broader range of luminosity levels in a single image, accurately representing the variations in brightness and contrast that our eyes can perceive in the real world. The purpose of HDR is to overcome the limitations of conventional photography, which can often result in the loss of detail in very bright or dark areas due to the restricted dynamic range of cameras.
How HDR works: combining multiple exposures
HDR photography works by taking multiple exposures of the same scene at different brightness levels, typically referred to as “bracketed exposures.” These exposures are then combined using specialized software to create a single image that encompasses the full range of luminosity present in the scene. This process results in a photograph that more accurately represents the visual experience of being present in the space, capturing details in both the brightest and darkest areas.
Benefits of using HDR in real estate photography
In the competitive world of real estate, high-quality images can make a significant difference in attracting potential buyers and setting a property apart from the competition. HDR photography offers several benefits for real estate professionals:
- Enhanced image quality: HDR images have a more balanced exposure, ensuring that details in both bright and dark areas are visible and well-defined.
- Improved realism: By capturing a broader range of luminosity, HDR photographs more accurately represent the true appearance and ambience of a property.
- Increased visual appeal: HDR images can make a property appear more inviting and appealing to potential buyers by showcasing its unique features and atmosphere.
- Better online presentation: With the majority of property searches now taking place online, high-quality HDR images can help your listings stand out and make a strong first impression on potential clients.
- Reduced reliance on additional lighting: HDR photography can help compensate for challenging lighting conditions, reducing the need for additional artificial lighting during shoots.
Step 2. Essential Equipment for HDR Real Estate Photography
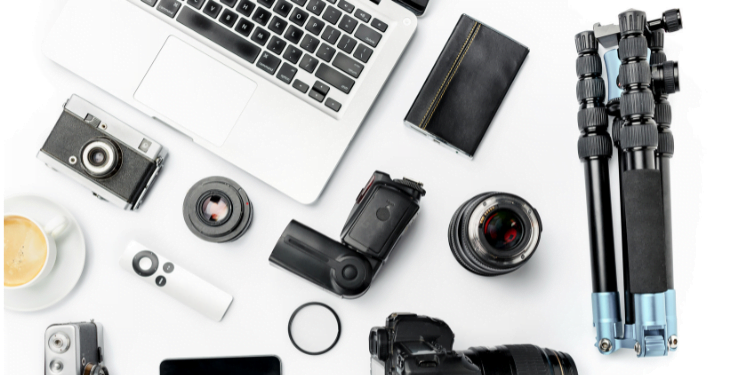
To create stunning HDR real estate images, you’ll need to have the right equipment on hand. Here’s a breakdown of the essential gear for capturing professional-quality HDR photos:
Camera with HDR capabilities or manual exposure settings
The first and most important piece of equipment is a camera that is suitable for HDR photography. Many modern cameras come with built-in HDR functionality, which can automatically capture multiple exposures and combine them into a single HDR image. If your camera does not have built-in HDR capabilities, ensure that it allows for manual exposure adjustments so that you can capture bracketed exposures yourself. Digital SLR cameras or mirrorless cameras with manual exposure settings are generally the best choice for this purpose.
Sturdy tripod
A tripod is an essential piece of equipment for HDR real estate photography, as it ensures stability and eliminates camera shake during the capture of multiple exposures. Since even the slightest movement between shots can cause alignment issues during the merging process, using a sturdy and reliable tripod is crucial. Look for a tripod with adjustable legs and a secure mounting system to accommodate various shooting angles and heights.
Remote shutter release
A remote shutter release is another essential tool for HDR real estate photography, as it helps minimize camera shake and ensures consistent results across exposures. By using a remote shutter release, you can trigger the camera without physically touching it, reducing the risk of introducing movement between shots. Remote shutter releases are available in both wired and wireless varieties, so choose one that is compatible with your camera and provides the level of convenience you prefer.
Step 3. Capturing HDR Real Estate Photos
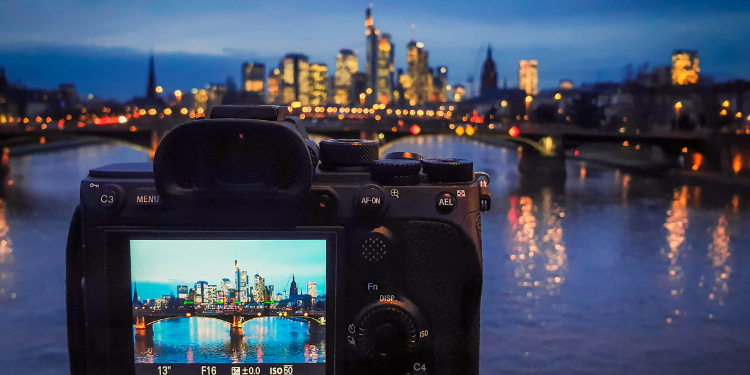
Capturing stunning HDR real estate photos involves setting up your camera correctly, using effective composition techniques, and employing best practices during the shoot. Here are some tips to help you capture the best possible HDR images:
Setting up your camera for bracketed exposures:
- Aperture priority mode – To maintain a consistent depth of field across all exposures, set your camera to aperture priority mode. This ensures that the aperture remains constant while the shutter speed varies to achieve the desired exposure levels.
- Exposure bracketing – Enable exposure bracketing on your camera to automatically capture multiple photos with different exposure levels. This is essential for creating the range of exposures needed to produce an HDR image.
- Setting the exposure value (EV) increments – Choose an EV increment of 1 to 2 stops for a good range of exposures. Smaller increments (e.g., 1 stop) provide more subtle variations in exposure, while larger increments (e.g., 2 stops) produce more dramatic differences. Experiment with different EV increments to find the best balance for your specific shooting conditions.
Framing and composition tips:
To create visually appealing images, use composition techniques such as the rule of thirds, leading lines, and proper framing. These guidelines can help draw the viewer’s eye to important features within the property and create a sense of balance and harmony in the photograph.
Shooting tips for optimal HDR results:
- Ensure adequate lighting – While HDR photography can help compensate for challenging lighting conditions, it’s still essential to have adequate lighting for the best results. Use natural light whenever possible, and supplement with artificial lighting when necessary.
- Avoid direct sunlight – Direct sunlight can create harsh shadows and glare, which can be difficult to correct in post-processing. Schedule your shoots during times when sunlight is indirect, such as early morning or late afternoon, for more even and balanced lighting.
- Minimize glare and overexposed areas – Be mindful of reflective surfaces such as windows, mirrors, and shiny appliances, as they can cause glare and overexposed areas in your photos. Adjust your shooting angle or use polarizing filters to help minimize these issues.
Step 4. HDR Real Estate Photo Editing Process
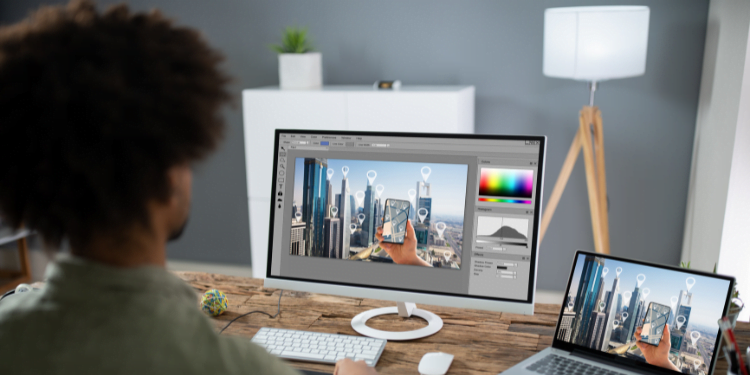
Creating stunning HDR real estate images involves not only capturing the right exposures but also effectively editing them to produce the final result. Here’s an overview of the HDR editing process:
Selecting the right software:
- Popular HDR editing software options – There are several HDR editing software options available, with Adobe Lightroom, Photomatix Pro, and Aurora HDR being popular choices among photographers. Each offers unique features and benefits, so research and compare these options to find the best fit for your needs.
- Choosing the best software for your needs – When selecting HDR editing software, consider factors such as your budget, ease of use, and compatibility with your existing workflow. Some software may offer more advanced features but come with a steeper learning curve, so weigh the trade-offs before making a decision.
Merging the bracketed exposures:
- Importing images into the software – Begin by loading your bracketed exposures into your chosen HDR editing software. This typically involves importing the images as a set or sequence.
- Aligning and merging the exposures – The software will generally offer an option to align and merge the images, creating a single HDR image. This process involves blending the different exposures to capture the full range of luminosity present in the scene.
- Creating an HDR image – Once the software has generated the HDR image, review it for any alignment or merging issues. If necessary, make adjustments or fine-tune the merging process to achieve the best possible result.
Fine-tuning the HDR image:
- Adjusting tone mapping settings – Tone mapping is a critical step in the HDR editing process, as it helps enhance the dynamic range of the final image. Adjust tone mapping settings to achieve the desired balance of brightness, contrast, and detail in your HDR photo.
- Enhancing colors, contrast, and sharpness – To bring out the best in your HDR image, make adjustments to color balance, contrast, and sharpness as needed. This may involve tweaking color saturation, adjusting contrast levels, or sharpening details for improved clarity.
- Fixing common HDR-related issues – During the editing process, you may encounter common HDR-related issues, such as ghosting (caused by movement between exposures) or noise (resulting from high ISO settings or aggressive merging). Address these issues using built-in software tools or by fine-tuning your editing settings.
Outsourcing HDR Real Estate Photo Editing with Dropyourimage
- The benefits of outsourcing photo editing – Outsourcing your HDR real estate photo editing to a professional service like Dropyourimage can save you time, streamline your workflow, and ensure consistent, high-quality results.
- How Dropyourimage works – Dropyourimage specializes in real estate photo editing, including HDR processing. Simply upload your bracketed exposures, and their team of expert editors will handle the editing process, merging exposures, and fine-tuning the final image according to your specifications.
- Customization and turnaround time – With Dropyourimage, you can request custom edits or adjustments to suit your unique requirements. Their fast turnaround times help you deliver professional-quality HDR images to your clients promptly.
- Building a partnership – By outsourcing your HDR real estate photo editing to Dropyourimage, you can build a strong partnership with a reliable service provider, allowing you to focus on capturing stunning images while they take care of the editing process.
Additional Tips for Professional HDR Real Estate Photo Editing
To elevate your HDR real estate photo editing skills, consider these additional tips and strategies:
Using presets and batch processing:
- Presets – Many HDR editing software options come with built-in presets or allow you to create custom presets that can be applied to your images. Presets can save you time by applying consistent adjustments to multiple images, ensuring a cohesive look and feel throughout your portfolio.
- Batch processing – If you’re working with a large number of images, batch processing can be a significant time-saver. This feature allows you to apply the same adjustments or settings to multiple images simultaneously, streamlining your editing process and increasing efficiency.
Experimenting with different editing styles:
Developing your unique HDR editing style involves experimentation and refining your techniques over time. Don’t be afraid to try different settings, tools, and approaches to find what works best for your images and aligns with your creative vision. This may involve experimenting with various tone mapping settings, color grading techniques, or contrast adjustments to create images that stand out and showcase the properties in their best light.
Knowing when to use HDR and when not to:
While HDR photography can greatly enhance real estate images, it’s essential to use the technique judiciously. Overuse of HDR can result in images appearing unnatural, overly saturated, or over-processed, which may detract from the overall appeal of a property. As a general rule, use HDR when it helps improve the image quality and brings out important details, but avoid it when the scene can be adequately captured with a single exposure. Striking the right balance between HDR and non-HDR images will ensure your portfolio remains diverse, visually appealing, and professional.

Conclusion
In this comprehensive guide, we’ve covered the essential aspects of HDR real estate photo editing, from understanding the basics of HDR photography to selecting the right equipment and capturing stunning HDR images. We’ve also provided an in-depth look at the HDR editing process, covering software selection, merging bracketed exposures, and fine-tuning the final image.
Encouragement to practice and improve HDR real estate photo editing skills
As with any skill, practice and persistence are key to mastering HDR real estate photo editing. By implementing the tips and techniques shared in this guide and experimenting with various editing styles, you can continue to refine your skills and develop your unique approach to HDR photography. As you grow more confident and adept in your abilities, you’ll be better equipped to create captivating and visually stunning images that showcase properties in their best light.
Call-to-action: Share your HDR real estate photography success stories
We would love to hear about your HDR real estate photography success stories! Whether you’re a seasoned professional or just starting your journey, your experiences and insights can inspire and help others in their own pursuit of excellence in HDR photography. Share your stories, tips, and advice in the comments below or on social media, and let’s continue to learn and grow together in the world of HDR real estate photography.